Pattern Review: Kimono Tee

I stumbled across the Kimono Tee a few years ago when I first started sewing. It’s a free (I love free!) PDF pattern by Maria Denmark. The pattern is a thank you for signing up for her newsletter.

If you aren’t familiar with Maria and her site, you should click on over and check it out. In addition to patterns, Maria offers e-books on fit and maintains an active blogging schedule focused on how to build a handmade wardrobe. Maria won me over when I read that she taught middle school for several years before launching her sewing business. As a former middle school teacher, I have a huge soft spot for fellow educators, especially those who taught/teach at the middle level.

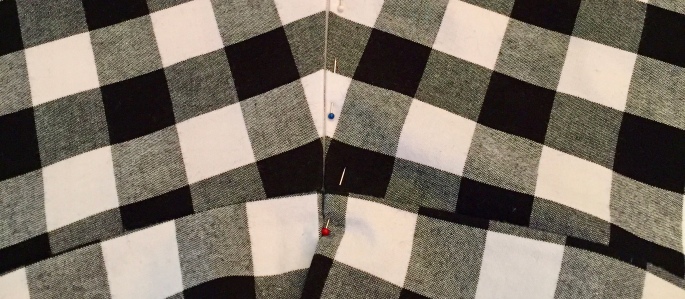
I wisely decided to sew a muslin of the Kimono Tee before cutting into my pretty fabric. The shirt is only two main pattern pieces and a neck band. Construction is simple. If you’ve made a knit shirt before, you probably won’t need to read them.

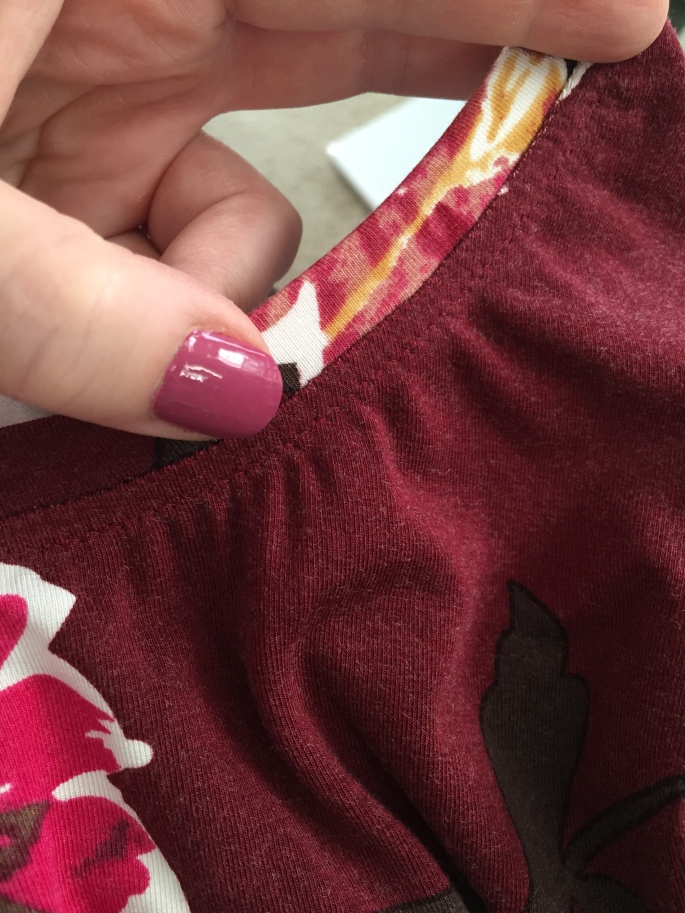
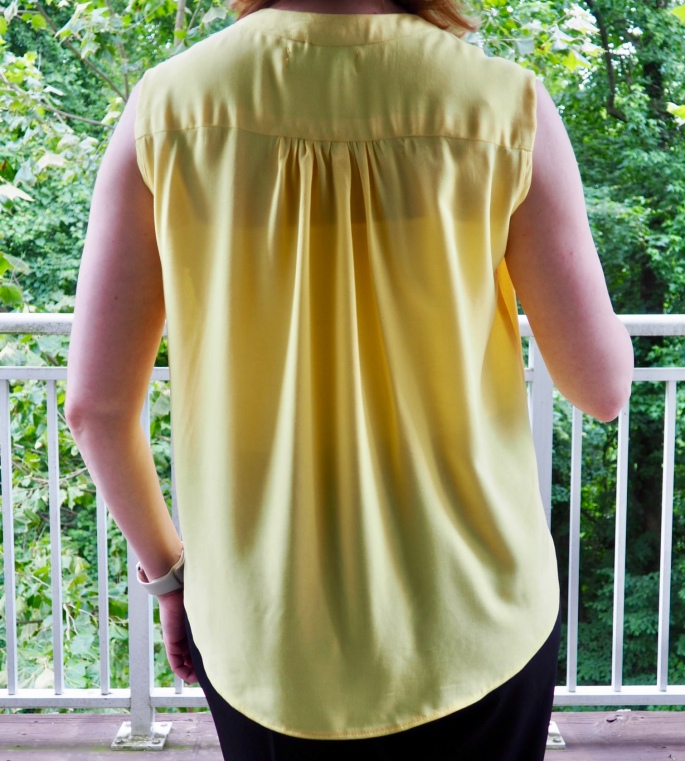
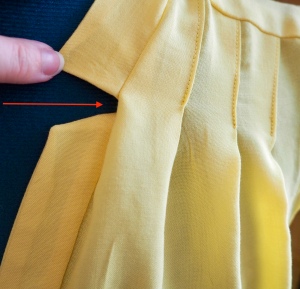
I made a muslin because I wanted to play around with the neckband finishing- visible t-shirt style or invisible and folded under. In addition, I’m in between waist and hip sizes on the pattern’s size chart and was a little worried about having enough room around my hips in the finished garment. The shirt did sew up too tight in the hips, so I graded out the side seams by about an inch and a half on each side. I went with a visible t-shirt style neck band for the muslin which turned out okay, but not great. I decided to go with the invisible finish for the final top.

OLYMPUS DIGITAL CAMERA


Since this shirt is such a fast sew, the muslin and final shirt were completed very quickly. I started mid morning and was done by lunch!

fullsizeoutput_1302.jpeg
Worn here with my linen Fint Culottes


Let’s talk about these fabrics…

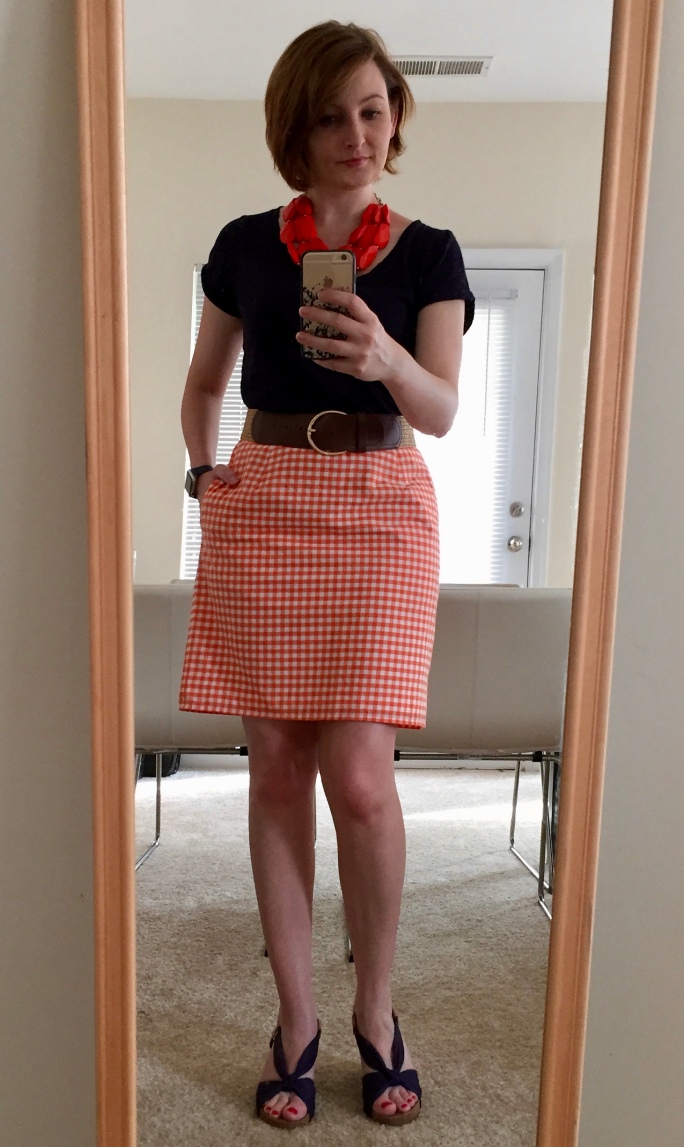
Something weird happens to me in fabric stores (and when browsing online for fabric). I fall for a print or color I would never select in a clothing store. Colors or prints I would pass over in a RTW garment because I know they don’t compliment my complexion are suddenly in my cart when I’m fabric shopping. A prime example is the fabric I used for this muslin.

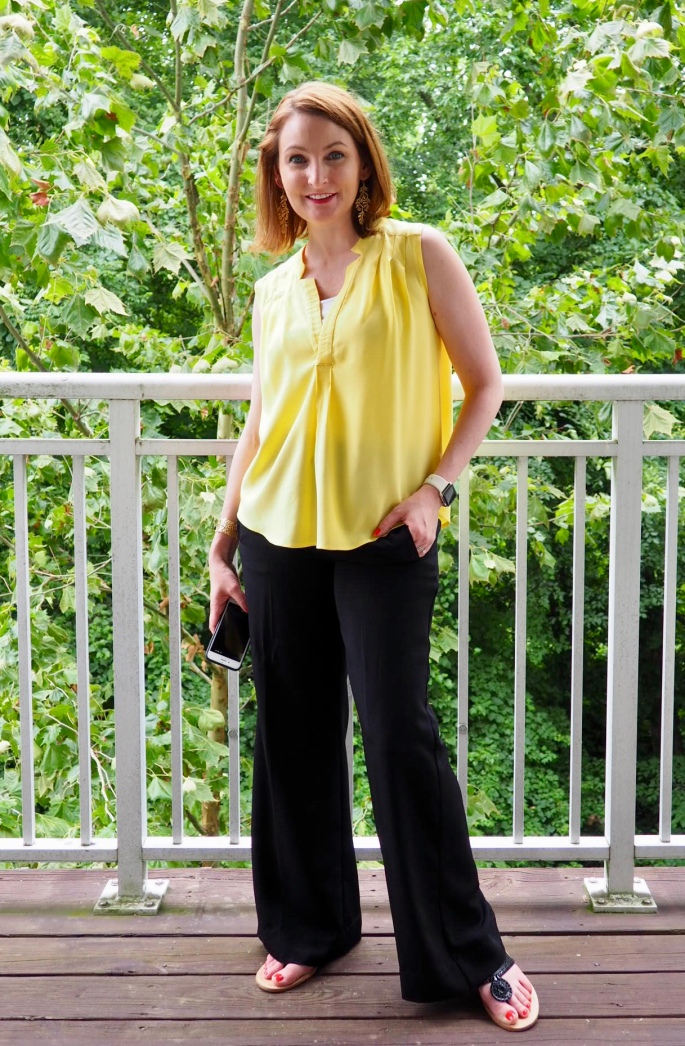
This midwestern style print features dusty shades of pale blue and coral. On the bolt, it was really pretty, but I know better. Coral is not a good color for my skintone and the blue in this print is too muted to provide any sort of visual pick-me-up. The resulting shirt badly washes me out.

OLYMPUS DIGITAL CAMERA
Look how close the coral matches my skin tone! Eek!

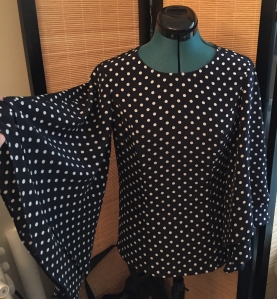
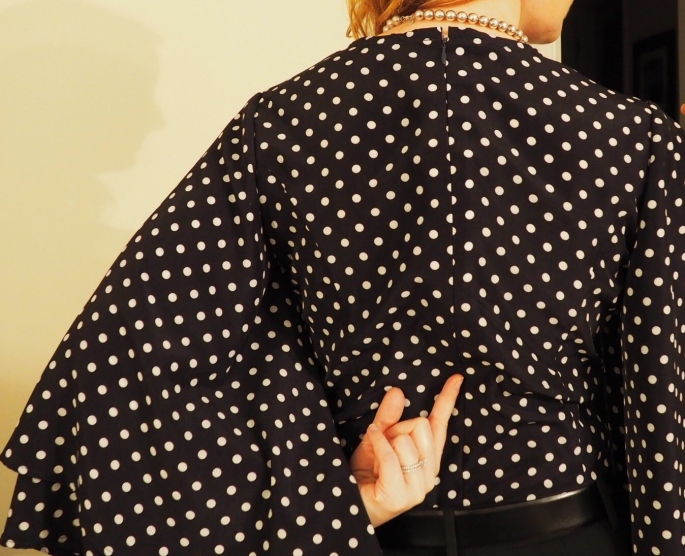
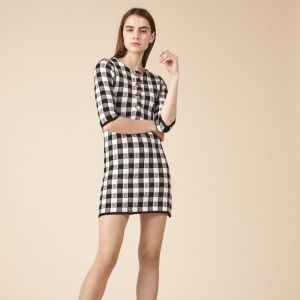
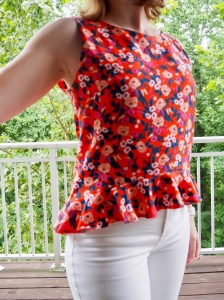
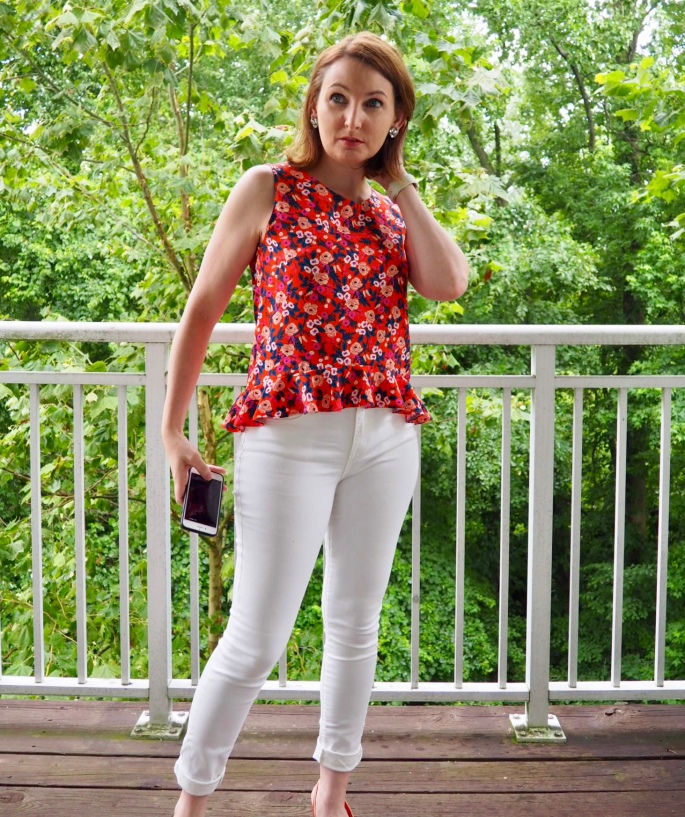
The second Kimono Tee was also made with a fabric that featured blue and coral, but this print really upped the wattage. The coral is bright and contains some red tones. The blue is dark, nearly navy. Additionally, this pattern utilizes a white background that really makes the colors pop. It looks a million times better on me than the knit I used for the muslin.

OLYMPUS DIGITAL CAMERA
Sorry about the brightness of the photo. I took the pictures on a REALLY sunny day.

It’s disappointing. I adore the pastel color palettes I see on so many IG accounts and love millenium pink (I hear that’s what the cool kids are calling it) , but such soft shades are poor matches for my skin tone. To fulfill my pastel dreams, I buy my husband lots of pale colored shirts and sweaters. The soft shades look great on him.

As I shop for fall fabrics, I’m trying to stick to the colors and shades I know are complementary to my skintone. It’s easier for me in the cooler months when stronger, darker colors fill the shelves.

Is it just me? Do you also buy fabrics that are pretty on the bolt only to find they don’t look particularly good on you?

Happy Sewing

XOXO

Pattern Review: 1 Dune, 3 Looks

As a former Floridian, I have extensive tank top wearing experience and hold firm beliefs on what makes a good tank.

First, the top should not be super tight to the body. When sweat is leaching from every pore, you don’t want fabric hugging your body and sopping up circles of moisture- ick.

Second, the straps should be wide enough that you can wear a regular bra (or racerback bra) underneath. The last thing you want to fuss with as you melt under the sun is a strapless bra sliding down your body.

Third, the neck should be on the modest side. I don’t think I am a particularly prudish dresser, but, as a part of the over 35 crowd, some things are better left to the imagination. (You know I love my lacy bras, but they shouldn’t be peeking out and upstaging my outfit.) Plus, a higher neckline allows the tank to be worn in a variety of situations, not just trips to the beach.

Because of my strict criteria, I had a tough time finding a tank sewing pattern.

Enter Dune by Valentine and Stitch.

I’ve sewn Dune three times so far and, not only does it meet my criteria, each version looks completely different. Non-sewists would assume I sewed three different patterns!

Dune #1


For my first Dune, I sewed a size XS. This was a mistake. I meant to sew a size small. I blame The Great British Baking Show. I was watching a particularly intense episode featuring French pastries on Netflix while cutting out and assembling the pattern. I got distracted and cut the wrong size. I didn’t realize my mistake until I was preparing to sew up version 3!

Dune offers both low and high necklines. The low neckline isn’t super low, but, as stated above, I prefer a higher neck. The only change I made to the pattern for this version was to finish the neck and arms with t-shirt style bands. The pattern suggests turning the bands under completely to give a smooth finish. I thought leaving the bands visible looked cool in this print, so I went with it.

The fabric I used is a cotton knit with a lot of stretch and a fun geometric print.

Despite sewing up the wrong size, the resulting top fits. As long as I don’t gain an ounce, it will continue to do so!

Version 2


While it is a simple top to make, the style lines have a big impact. The shoulders are slightly cut in and the waist flares gently out. This highlights a curvy figure and glides over the body in places where other tops cling unattractively.

fullsizeoutput_12eb.jpeg

Dune #2


I decided to make Dune #2 in a bigger size for a more relaxed fit. Thinking I’d sewn up a size small for Dune #1, I cut out a medium and selected a leftover piece of gray knit fabric from my stash. Dune’s construction is incredibly simple and I didn’t need to look at the directions for this version. I woke up early and was finished with my second Dune before my husband kicked me out of the sewing room/home office for an early morning conference call. It took me about an hour to sew.

Version 2

Like my first Dune, I finished this tank with exposed neck and arm bands. The result is a very casual top that seems to go with all the bright bottoms in my closet. So far, this is my most worn Dune. Since sewing it last week, I’ve worn it three times! It pairs really well with all my colorful summer shorts.

Dune #3


Dune #3 is a dramatic departure from the first two. Helen, the mastermind behind Valentine and Stitch, modeled a maxi version of Dune on IG recently. I loved the drama of the maxi version and thought it could transition nicely into fall with a jacket.

I selected a fairly thick burgundy floral knit from my stash and took over the living room floor to cut it out. It was during this process that I realized I’d cut an extra small for Dune #1. I recut my pattern pieces to sew the maxi in a size small.

Unfortunately, my chosen fabric wasn’t long enough to cut both the front and back pieces of the maxi, so I got creative. I cut the front of the dress in one continuous piece. Then, I cut the back in three sections:

  • Bodice back, ending above the waist
  • A panel at the mid back. I included a swayback adjustment in this piece.
  • Bottom half of the skirt

I sewed these three back pieces together and checked them against the front piece to make sure all the seams matched up. Luckily, they did!

fullsizeoutput_12e0.jpeg

Dune #3 sewed up nearly as quickly as the first two, but I struggled finishing the neck and arm holes on this version. Since the fabric was thick, sewing on the bands at the neckline and arm holes was a bit of a nightmare. Despite using a stretch needle and walking foot, the fabric at the neck bunched up terribly when I applied the neck band.

IMG_5797

Plan B was to sew in a facing. This was also a failure. The fabric was too heavy to lay flat. Even with understitching, the inside of the facing rolled up and out.

After a deep and calming breath, I employed Plan C. I pulled out all the stitches from the band and steamed the neckline in an attempt to relax the fabric back into place. I then folded the edge of the neck over and sewed it down. It worked perfectly. I did the same for the arm holes. Thankfully, all my stitching and unstitching didn’t seem to stretch out the fabric and the hemmed edges are flat and smooth. In retrospect and considering the thickness of this knit, Plan C should have been Plan A. OLYMPUS DIGITAL CAMERA

I’m pretty pleased with my maxi Dune. It earned a voluntary “I like that” from my notoriously picky husband.

The autumnal color and thicker knit mean it will transition well into fall. I played around styling it for cooler weather and like how it looks with my old RTW denim jacket and brown ballet flats.

fullsizeoutput_12ee.jpeg

Concluding thoughts on Dune


Dune gets top marks from me. The simplicity of the shape means you can use all sorts of prints and different knit weights. It’s a fast sew (instant sewing gratification is the best!) and the style lines are really complementary on those of us with curves. Plus, my three versions look very different. I don’t feel like I’m wearing the same thing over and over even though I used the same pattern.

I’m taking a Dune break this week and working on some more lingerie; although more Dunes are certainly in my future. I could use some more in basic colors… maybe black for fall layering with jackets and jeans.

Have you tried Dune yet?

Happy Sewing!

XOXO

Pattern Review: Burda Magazine Flounce Sleeve Blouse 2017-7-119

The Burda Style Magazine for July 2017 contained several patterns that caught my eye. I shared a few of them on my IG Story and, with help from some IG friends, determined my monthly make should be the ruffled sleeve top, style #119.

Burda Style top
Image from BurdaStyle.com

Since I have a healthy stash, I didn’t want to purchase fabric for this top. I figured something I already owned should do the trick. After debating several options, I settled on a printed swiss dot I purchased at Joann Fabrics early in my sewing career, probably about five years ago.

OLYMPUS DIGITAL CAMERA

Light, with a gentle drape, this fabric has more body than the examples in the magazine. I was worried it might turn out too stiff, but, after spending some time this weekend in Georgetown boutiques and seeing one cotton ruffled and flounced top after another, I decided cotton was on trend for this type of top and would look fine.


The pattern is very simple. It consists of only six pieces and is pulled on over the wearer’s head without any zips or button bands. According to the Burda Magazine ratings, this is an intermediate pattern. I agree. While not a particularly difficult sew in a well-behaved cotton fabric, the sparseness of directions required significant sewing know-how to complete this project.

Version 3
OLYMPUS DIGITAL CAMERA

The trickiest bit was the sleeves. I read the directions over and over. They could have been in the original German… I have no idea what they wanted me to do. The incomprehensibility of the directions was impressive. I have followed dozens of sewing pattern instructions over the years, spent over a decade teaching people how to read and write, and hold advanced degrees in English, but I could not figure out those sleeve instructions. No clue.

I finally figured it out by pinning the sleeves onto the bodice and fiddling with them on my dress form until they looked right. (Unfortunately, I was so in the sewing zone that I failed to take photos as I went. Sorry about that!) After much pinning, I decided to fold the sleeves back along the shoulder seam. At the dart in the sleeve, I folded the sleeve back over itself, lining it up again with the shoulder seam and allowing the excess fabric to drape down. This created the sleeve flounce. I basted the shoulder seam, now three pieces of fabric thick, together. For the back sleeve, I folded the fabric back over the shoulder seam and continued the fold around half of the back neckline. At the sleeve dart, I folded the sleeve back over itself and basted all three pieces of fabric as one. The shoulder seams were then sewn together. Each shoulder seam consisted of six layers of fabric! Luckily, with this light cotton, thickness wasn’t a problem and it sewed up easily.

After spending ages scratching my head over the sleeves, I was in no mood to fuss with the fabric loop for the front closure. I found a piece of thin black satin ribbon that I decided would do the job. When sewing the facing to the neckline, I pinned it into place between the two layers of fabric. I positioned the loop facing away from the neck opening. Once sewn together, I turned the facing right side out and the loop was in the perfect spot. The directions for attaching the loop are poor. They tell you to attach it, but don’t describe how. This sewing knowledge is assumed. I strayed from the directions by understitching the facing. This resulted in a crisp facing fold at the neckline.

OLYMPUS DIGITAL CAMERA

Directions on how to construct the bottom of the flutter sleeves were given but, I ignored them. The directions suggest folding over the fabric once and securing the fold with a short zigzag stitch. I worried this would produce a messy finish. Instead, I serged the hem of the sleeves. Then, I folded the serged ends to the inside and secured them with a straight stitch. I think my method produced a neater finish than the recommended method. A rolled hem would also look nice.

OLYMPUS DIGITAL CAMERA
I am wearing a navy camisole under the top due to the depth of the open neck. I think I can get away without it for casual wear.

The finished top was too long on me. This wasn’t surprising as I am shorter that the measurements Burda uses to create patterns. I cut 1.5 inches off the bottom length. I thought a deep hem might balance the heft of the sleeves, so I folded and pressed the hem by 1/2 inch. Then, I folded it over again by 2 inches and sewed it down. This produced a wide 2 inch hem and provided the visual balance I was seeking.

Version 3


I finished this make with a round pearl-white button at the neck.

OLYMPUS DIGITAL CAMERA


I like the final shirt so much that I forgive Burda for the poor directions.

OLYMPUS DIGITAL CAMERA

Did you sew a style from the July issue? Tell me all about it in the comments!

Happy Sewing!

XOXO

Gingham: A Contemporary Take on a Summer Staple

Of all the fabric choices we have as sewists, gingham screams “Summer!” the loudest. This year, gingham is particularly popular. Stores are full of gingham garments and just this week the Today Show did a fashion bit featuring gingham as a hot summer fashion trend. The segment is sort of a train wreck, but, if you want to kill a few minutes, it’s mildly entertaining.

I’m a big fan of sewing with gingham, but am always wary of looking like I’m wearing a picnic blanket. To avoid this and give my gingham a contemporary edge, I like sewing with gingham in colors other than red and blue.

Purple Gingham

I used to hate the color purple, but, as I’ve gotten older, I find myself liking it, especially on me. I think it’s a good color for us brunettes. I chose a small purple gingham for this McCalls wrap top. This make was one of my first successful blouse projects and I still wear it a lot during the summer months. Unfortunately, the pattern I used, M6564, is out of print (OOP). McCalls does have a current pattern that looks very similar. M7358, view B, appears to have nearly the same structure.

fullsizeoutput_1125
Nope, I haven’t chopped my hair. This is an older photo!

Black Gingham

Black gingham is easy to find this season. I’ve seen black gingham sewn into a range of garments. Two examples are below.

Rag and Bone offers this simple t-shirt. It will set you back $115.

Black gingham t-shirt

Maje Paris sells this simple sheath dress with XXL press studs down the front for $198 (on sale now from $495).

Maje_E17RIMIA-02_H_1

I decided to make a skirt with my black gingham. I purchased the fabric from Fabric.com for no more than $15/yard. A bargain compared to RTW! The pattern is Sewaholic’s Hollyburn Skirt. I’ve paired this skirt with lightweight sweaters, tank tops, and blouses. For a vintage feel, I wore it here with a red knit Pavlova top from Cake Patterns.

fullsizeoutput_1121

Orange Gingham

While I’ve spotted a lot of gingham this summer, orange gingham is hard to find. To date, I haven’t seen any orange gingham in the stores. This is one of the perks of sewing- wearing colors hard to find in RTW!

Navy and orange are a classic combination and representative of my alma mater (Go Gators!). It’s a combo I love to wear. My orange skirt here is Simplicity New Look 0119 with added pockets. I think this one is also OOP. Any woven straight skirt pattern can work for this look. New Look 6492, view A, looks like the same thing. I’m wearing it here with a RTW t-shirt.

fullsizeoutput_1123

I have at least one gingham project planned before summer ends, so my collection is still growing. Keep watching the blog for a gingham update!

Do you sew with gingham? Have you used non-traditional gingham colors? Tell me all about it in the comments!

Pattern Review: McCalls 7094

One of my favorite things about sewing is that I can make garments to the proportions I want. As sewists, we have the power to chop off length, take in side seams, and lower necklines at will. We can make what we want EXACTLY the way we want it. It can be a power trip!

Sewing McCalls 7094, I felt every bit the master of my sewing universe. I disobeyed the pattern envelope sizing, lopped inches off the bottom, and redrafted the hem (see specifics in the review below). The result is a top that fits and appears just the way I intended.


fullsizeoutput_f7a

I am wearing my new top below with a white camisole underneath because the fabric I selected for this make is pretty sheer. Made in a different fabric, a camisole would not be necessary with this top. The top is paired with RTW wide-legged pants. Together, it’s a very relaxed summer look. It’s perfect for real life summer excitement- mornings at the farmer’s market, afternoon cookouts, and (in my case the much more frequent) trips to the grocery store and Target.

OLYMPUS DIGITAL CAMERA

Below is a full review including details on how I modified the pattern to get the fit I wanted. This review is also available on Pattern Review.


Pattern Description: The pattern envelope describes this pattern as “very loose-fitting” and the picture indicates a loose fitting top that can be made with or without sleeves and with three hem options. The many options mean this top could be appropriate for any season depending on the fabric used and sleeve options chosen.

Pattern Sizing: Misses

Did it look like the photo/drawing on the pattern envelope once you were done sewing with it? My version is a little bit shorter than the version on the envelope, and I redrafted the bottom hem. Otherwise, it looks pretty much the same.

Were the instructions easy to follow? Yes with the exception of finishing the bottom of the placket. I’m still not sure what they wanted me to do… I sewed all the fabric together and topstitched it down. It worked fine.

What did you particularly like or dislike about the pattern? I really like the pleated detailing at the shoulders. I decided to top stitch my pleats down to keep them symmetrical and flat. I think it worked out well.

OLYMPUS DIGITAL CAMERA

I also like the gathering at the center back.

OLYMPUS DIGITAL CAMERA

Finishing the notch collar took two tries. I misaligned the collars the first time and had to rip out stitches to make a second attempt. See the red arrow below to view my misaligned collar notch. Luckily, it was an easy fix. I ripped out a few stitches and was able to realign the seam.


OLYMPUS DIGITAL CAMERA

The pattern directions have you slip stitch all the facings which took forever. It did result in a neat finish on the inside of the shirt. Nearly all the seams are encased in facings. The only visible seams are the side seams. I serged them together. I like the result, but didn’t enjoy all the handwork at the time.

My only other complaint about this top isn’t the fault of the pattern. It’s a problem with my fabric choice. Because the challis I used is pretty sheer, you can see through the fabric on the collar to the underlying seam allowances (you can see this in the photos above)- not cute, but not the pattern’s fault. In hindsight, I should have sewn the interfaced pieces on the outside of the top. The reverse side of the collar looks better than the correct side because the interfacing prevents you from seeing through the fabric to the graded seam allowances under the fabric. Oh well… live and learn, right?

Fabric Used: This yellow rayon challis was the last of my latest purchase from Vogue Fabrics‘ summer catalogue. I love the sunny color, but it’s sheerness is a drawback. I have to wear a camisole under the top. This is fine in air conditioning, but will be hot walking around the city this summer.

On a related note, Vogue Fabrics has redone their website and it’s much more user friendly. If you were put off previously by its clunkiness, you’ll like the new format. It still isn’t the prettiest site out there, but this is certainly an improvement.

Pattern alterations or any design changes you made: I made a few modifications on this top.

First, I ignored the pattern sizing suggestions. According to the size chart on the back of the envelope, I should have sewn a medium. Before I cut the pattern, I checked the size of the main pattern pieces against a loose fitting top currently in my closet. Even with the addition of seam allowances, the extra small was a smidge larger than my existing shirt. The medium would have been HUGE. I cut and sewed the extra small.

Second, I shortened the top one inch at the lengthen shorten line when cutting out my fabric. At the time, I thought that would shorten it enough.

Once the top was done except for the bottom hem, I decided it was still too long. I also thought the shirt tail was much too dramatic a curve. There was a seven inch difference from the side of the shirt to the front/back center hem. The effect was weird on me. It looked like the top wasn’t sure if it wanted to be a shirt or a tunic. I lopped off about two inches at the side seams and drafted a gentler curve at the front and back hem.

Would you sew it again? Would you recommend it to others? Yes and yes. I may make another with sleeves for cooler weather. I do recommend checking the size with a shirt you already own and be mindful of the dramatic hem!

OLYMPUS DIGITAL CAMERA

Conclusion: This top is a sunny addition to my summer wardrobe!

Happy Sewing!

XOXO

Pattern Review: Moana Dress/Top

I have junk in my trunk and I’m not talking about my car.

OLYMPUS DIGITAL CAMERA
My challenge with this pattern? My bum!

Sometimes a pattern reminds us that, while we may be totally okay with our body’s quirks- narrow back, high bustline, short legs, etc., sewing patterns are not always okay with these aspects of our physical selves. The Moana Dress by Papercut Patterns sent me one such reminder this weekend. This project was nearly a sewing fail, but, after a short separation (I needed some time away…), I managed to turn it into a sewing save.

I picked up the Moana Dress/Top and two other Papercut Patterns recently at Stitch Sew Shop. They were trying to make room for the newest round of Papercut Patterns and running a sale on the older styles. I’d been eyeing Moana for a while. Stitch Sew Shop had an impossibly adorable version of the dress in their window a while back that prompted me to sew one of my own.

The colorful floral rayon I used was also purchased from Stitch. The fabric is part of Rifle Paper Co.’s Wonderland line with Cotton + Steel. It’s got a lovely hand and was nice to sew. I made a muslin of the top of the dress and determined the only adjustment I needed to make was to move the bust darts down 1/2 inch. In hindsight, I should have muslined the whole dress…

The final dress was terrible. The armholes gaped out at my armpits and the bottom of the dress was a bright floral billboard across the widest part of my body further highlighted with ruffles and gathers. So. Many. Gathers. It was so bad that I didn’t even take photos. I don’t want to be the cause of my blog readers’ retinal bleeding.

I ripped off the bottom of the dress and took in the side seams to reduce armhole gaping. Gaping wasn’t a problem on the muslin, so I wonder if I stretched the fabric as I sewed the armholes without realizing I was doing it. Because I had to take them in, the seams under the arms aren’t as neat as I would like, but it’s only visible on the inside of the top. Luckily, some careful picking and a run through my serger finished the ruffle seam. I don’t think anyone could tell that a horrifying mistake of a gathered skirt was once attached.

OLYMPUS DIGITAL CAMERA
A little blurry, but you get the idea…

Despite the agony this pattern put me through, I do like the finished top with white jeans. It’s a bright summer look that suits me. I also really like the burrito rolling method of sewing the armhole facing to the armhole that the pattern featured. It’s a clever method I will use again. My full review of the pattern is below.


This review is also available on Pattern Review.

Pattern Description: Dress or top with a high-low ruffle at the waist

Pattern Sizing: Misses

Did it look like the photo/drawing on the pattern envelope once you were done sewing with it? The top looks like the envelope, but in the dress version I attempted to make, the skirt was significantly more gathered than the skirt on the envelope front.

Were the instructions easy to follow? Yes. The directions for sewing the armhole facing to the armhole were particularly well done.

What did you particularly like or dislike about the pattern? The dress version of this pattern was a disaster. Once I lopped the skirt off, the resulting top is cute and very wearable. It’s a cropped length, but just long enough for me to raise my arms over my head and not flash my stomach.

OLYMPUS DIGITAL CAMERA
Arms up and my stomach is still covered! Whew!

Fabric Used: Wonderland rayon from Cotton + Steel

Pattern alterations or any design changes you made: I moved the bust darts down 1/2 inch and took in the armholes by about an inch at the side seam due to gaping.

Would you sew it again? Would you recommend it to others? I probably won’t make this again any time soon. I would recommend the top version if you’re on the hunt for a cute sleeveless top with a ruffled bottom.

OLYMPUS DIGITAL CAMERA

Conclusion: This pattern made a nice ruffled top for summer. If you have curvy hips and a bum, stay away from the dress version. It’s not flattering.

Happy Sewing!

XOXO

Pattern Review: McCalls 7542 and Flint Culottes

Today’s review is a two-for-one: the Flint Culottes and the very popular McCalls 7542!

Flint Culottes

fullsizeoutput_ea0.jpeg

First, I sewed Megan Nielsen‘s newest pattern, the Flint Culottes. I’ve been on the fence with the culotte trend, but when I saw Megan’s design, I decided to go for it. I was originally taken with the cute little side bow on version 2, but, in response to my husband’s plea to limit the number of bows in my wardrobe (he seems to think it is possible to have too many bows…), made up version 1 with the two-button closure.

The button closure is cleverly constructed. The overlapping fabric used to create the pocket doubles as the opening for the pants. No side zipper or fly closure is needed!

Below is my full review. (Also available on Pattern Review.):


Pattern Description: Summer-perfect culottes

Pattern Sizing: I made a muslin first and was glad I did. Referring to the back of the fullsizeoutput_eacpattern envelope, I realized I was between sizes at the waist measurement. I cut the small for the muslin and it fit- if I didn’t breath. Feeling a bit chubby, I cut the medium and that worked much better.


Did it look like the photo/drawing on the pattern envelope once you were done sewing with it?: Yes, even my muslin looked good.

Were the instructions easy to follow?: The pattern directions were clear and there were no tricky parts that had me scratching my head or running for help online.

What did you particularly like or dislike about the pattern?: I love the fullness of the pant. When I’m standing still, it looks like I’m wearing a skirt, which I think is pretty neat.


Fabric Used: I used a navy linen I ordered during a Craftsy supplies sale. I believe it’s from the Robert Kaufman line. It has a nice drape and, unlike some linen fabrics, it didn’t “grow” with wear during the day.

Pattern alterations or any design changes you made: I’m vertically challenged, so I took about 3.5 inches off the length of the pant. I took two inches at the lengthen/shorten line when cutting them out and another inch and a half after trying them on in the linen fabric. I think the linen hung lower than the muslin I made, necessitating taking more length off the bottom.


OLYMPUS DIGITAL CAMERA

Would you sew it again? Would you recommend it to others?: I might sew it again. The style is distinctive, so if I make another version, it will be in a very different fabric- perhaps something dressier with even more drape. I definitely recommend it to others. If you’ve made a few pairs of pants already, this is in your wheelhouse.

Conclusion: This pattern is worth the price and the time needed to make the culottes. In my signature navy, I am sure to wear this pair throughout the summer.


McCalls 7542

My second pattern is the super popular McCalls 7542, a simple top with multiple dramatic sleeve options. Since venturing into the world wearing Vogue 9243, I’ve determined I need more statement sleeves in my life. This top is all over Instagram and sewing blogs and, I have yet to see a version I didn’t like. The pattern is so in demand, I had to order my copy directly from McCalls. My local Joann Fabrics store was sold out of the pattern each time I stopped by to purchase it.

OLYMPUS DIGITAL CAMERA

I made this shirt specifically to pair with my Flint’s but I’m worried that it’s one trend too many in a single outfit. Despite this nagging concern, I wore the two pieces together earlier this week. No one laughed, at least not to my face, so I think I pulled it off okay. Below is the full review for McCalls 7542. (Review also available on Pattern Review.)


Pattern Description: Simple top with a cropped option and several sleeve variations. I went with version D.

Pattern Sizing: I cut a 12, my usual McCall’s size and the fit is spot on.

Did it look like the photo/drawing on the pattern envelope once you were done sewing with it?: Yes, the top turned out exactly as I expected it would based on the envelope.

Were the instructions easy to follow?: Nothing funky to report here. The directions and order of construction all made sense.

What did you particularly like or dislike about the pattern?: BELL SLEEVES! I feel very feminine in this top.

Inserting the sleeves into this top was agony. Next time, I will increase the number of

OLYMPUS DIGITAL CAMERA
Close-up of the sleeve “design feature” GAH!

gathering stitches I use to set the sleeve. As drafted, the gathering stitches should only be sewed along the sleeve head, but in order to gather the fabric for a smooth sleeve insertion, the stitches need to extend far below the points indicated on the pattern. I have some puckers (I’m calling them “design features”) at the heads of my sleeves where I gave up. I hope the busy print renders them invisible to all but the very discerning eye.


Fabric Used: I used a cotton sateen that’s been sitting on my stash shelves for a few years. I found it at Joann Fabrics on the sale table. The super busy print reminds me of something from the 1960s, one of my favorite clothing design eras.

Pattern alterations or any design changes you made: The sleeve flounce is cut as a

fullsizeoutput_eaf
These do not match up…

circle with a smaller circle inside that attaches to the sleeve. I noticed right away that the hole in my flounce was way too small for the bottom of the sleeve. I was feeling very done with puckered fabric by this point (I had just survived my sleeve-setting debacle), so I increased the size of the hole in the flounce by half an inch all around. With this modification, I was able to set and sew the flounces without any problems. I noticed on Pattern Review that a few other sewist experienced this problem with the flounce.

Would you sew it again? Would you recommend it to others?: Yes and yes! I think my next version will be in a solid color and a lighter fabric. I’m thinking maybe a cotton lawn in solid red…

Conclusion: Overall, this is a well drafted pattern that sews up quickly with an on-trend result. Hello, Summer 2017!

OLYMPUS DIGITAL CAMERA

Dramatic Sleeves & Vogue 9243

For my inaugural post, I decided to feature a recent make that I am in LOVE with: Vogue 9243. It features dramatic sleeves created with a double layer of fabric, a fitted bodice, and back zipper.

IMG_4794

I first fell in love with this pattern on Riva’s site. I generally love her style- bright, joyful, and fashion-forward. This particular top had me dying of jealousy. The polka dots and cascading sleeves manage to be both fun and classy. Crushing hard on her version, I did some Googling and found a video on YouTube featuring the pattern. As you can see, I copied the Vogue Pattern’s video version of this top:


Pattern Review

(Also available at Pattern Review.)

Pattern Description:

Top with enormous sleeves created with a double layer of fabric, a fitted bodice, and back zipper.

Pattern Sizing:

Misses. I sewed up my usual size 12.

Did it look like the photo/drawing on the pattern envelope once you were done sewing with it?

Yes! It looks just like the original in the Vogue Patterns video. I do have one small issue with the final top. There is a funky bulge at the bottom of the zipper if I am not careful to make sure the top is sitting squarely on my shoulders. I think this is due to the fact I put a zipper in very drapey fabric. I ordered a lightweight zipper, but I think it is still a bit too heavy for the fabric.

OLYMPUS DIGITAL CAMERA
Slight bulge at bottom of zipper

Were the instructions easy to follow?

Yes. The instructions were very clear. Construction is straightforward and no special skills beyond inserting an invisible zipper are needed.

I did have to practice patience. Hemming the sleeves took some time and a few cups of coffee…

IMG_4792

What did you particularly like or dislike about the pattern?

SLEEVES!!! I love the sleeves!

OLYMPUS DIGITAL CAMERA

Fabric Used:

I used a navy silk-like rayon from Joann Fabrics. I don’t see it currently on their website, but you might be able to find it in a store.

Pattern alterations or any design changes you made:

I found the side seams as drafted a little too narrow for me below the waist line. This was easily fixed by letting out the side seams below the waist by 1/4″ on each side. Other than this small change, I sewed it exactly as directed.


Would you sew it again? Would you recommend it to others?

Yes. I think one top with super dramatic sleeves is enough for my closet, but I do plan on making version D soon. It’s a bit more subtle.

Screen Shot 2017-05-29 at 9.03.50 AM

Conclusion:

I adore this top! It makes me feel fabulous which is the point of clothes, right?!